 Why not cut down the time so you can cut down the cost for your 3d print! Here are some ways to print with good quality but with less dollars.
Orientation of Parts
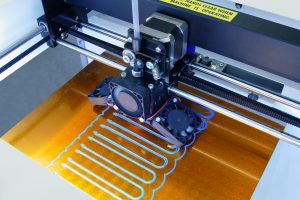
When printing multiple parts, work to arrange them on the platform in a configuration that limits the stringing between them and limits that stringing to the corners. This can both reduce the time it takes to print and the time it takes to cleanup your print. The photo below shows multiple objects are placed strategically onto one plate to reduce the time to clean up.
Infill Density
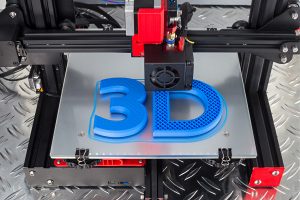
Infill is the material that comprises the interior of the 3D object between the outside shell/walls. Infill settings (measured in %) will affect print time and part strength. The higher the infill % the longer the print time will be. If you’re creating an item for display, 10-20% infill is recommended. If you need something that is going to be more functional and sturdy, 75-100% infill is more appropriate. And 0% is for anything fragile, preferably a shelve or desk decoration. The secret to a successful use of infill is to find the optimal point where sufficient strength is obtained for an object’s designed purpose, with both cost and time being kept within acceptable parameters. The photo below shows what a 20%-50% infill looks like inside the object "D".
Shell Thickness
Shells refers to the number of times the outer walls of the design are traced by the 3D printer before starting the inner sections of your design. This means that shell thickness is intimately tied to infill percentage. When you increase the shell thickness of an object, you are also increasing its strength (capable of handling stress without the need for increasing the 3D print infill density). However, every increase in shell thickness will drive up print time. 3D print slicing software, such as Cura and Dremel, normally have a default shell thickness of 0.8-1mm. There shouldn’t be any reason to change this for decorative prints however, if you are printing something that will need more durability, you may want to increase shell thickness. With the same image as above, you can also see the thick wall in the object - "D", thicker the walls, the more durable the print is.

Layer Height/Resolution
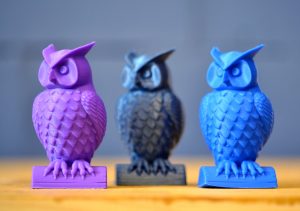
The height of each filament layer in your print directly affects the overall resolution of the finished print job. Prints made with thinner layers will create more detailed prints with a smoother surface however, it takes more time to print something, since there will be more layers that make up your object. Keep this in mind when designing your 3D print- If you want to print something with intricate details, you will get the best print with a thinner layer height. Prototyping? You can raise your layer height for a faster print job. The photo below demonstrates the visibility of the layers' height on the printer owls. You can see the lines and layers at the bottom of the print, where the owl is standing on. The thinner the layer, the less visible it is to the eye.
If you have any questions about your 3D designs, please email our 3D printing specialists at DigitalSpecialist@markhamlibrary.ca


Add a comment to: Design Tips From 3D Printing Specialists: Reduce Print Time