Tinkercad offers a lot of different basic shapes for users to get started with their designs. But what happens when Tinkercad doesn’t have the shape that you need? There are a few ways to create your own shapes by modifying existing shapes in Tinkercad.
For the month of June, Markham Public Library is running a 3D design challenge! If you are between grade 3-10, then you are eligible to join for the chance to win! For more information about the challenge, visit here.
First Method: Combine multiple shapes
Step 1: From the Basic Shape side-bar menu, click and drag all the shapes you need to create the shape that you want. Position individual shapes into the right angles using the rotation and the sizing features, you can activate those features by double-clicking the shape.
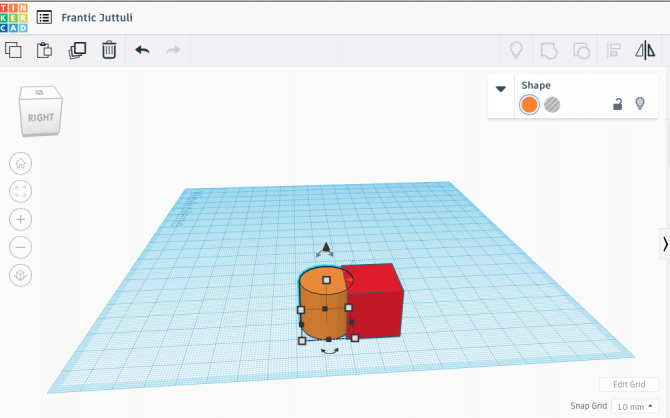
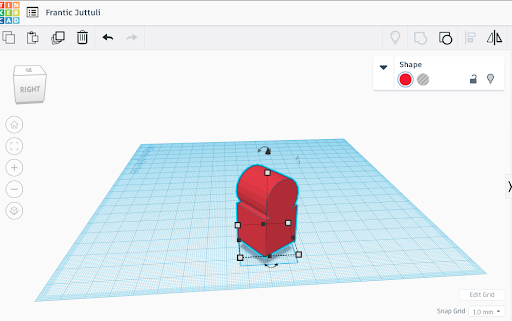
Step 2: Then select all the shapes and use the Group Function at the top right to group all the shapes into one. Read all the keyboard shortcuts Tinkercad has to make your designing process easier (hyperlink the shortcuts below). Once you have clicked the Group function, all the shapes will turn into one colour, which signify all shapes has combined into one.
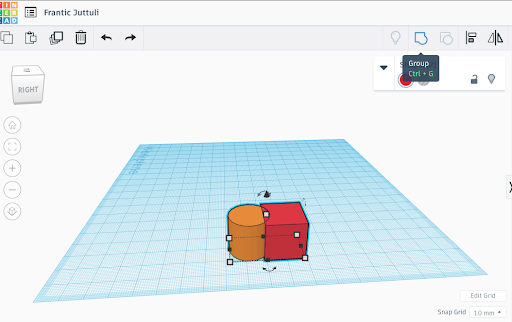
Step 3: You can modify the position of this new shape. If you want to un-group the shapes, you can select the new shape and select the Ungroup Function at the top right. Or, you can also select Undo at the top left.
Second Method: Use the Hole Function to modify shapes
The Hole Function is useful when you need to slice any original shapes. Tinkercad sees all shapes as solid and hole, which means, a shape is either visible or invisible. If you want to know all the Tinkercad shortcut to make your designing experience more efficient, here is a blog post on all the shortcut!
Step 1: Drag the shape you want to modify onto the workplane. Then drag another shape that you want to cut into your original shape. For example, if I want to create a green bird with a bulging white belly (yes, it sounds a lot like the green Angry Bird eh). I would need to first create my green sphere, and then take a hole-sphere and merge it into my green sphere. Tip: when you are merging the hole-shape into a solid-shape, look at the shapes from all angles before grouping the shapes.
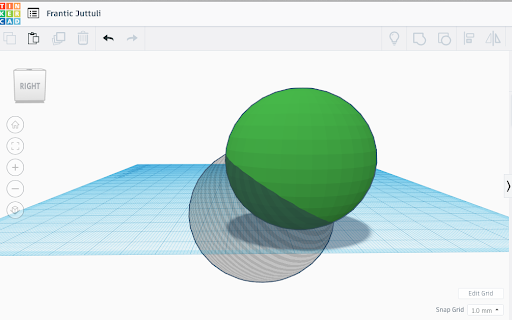
Step 2: Select both shapes and use the Group function to group it. A new shape will be created.
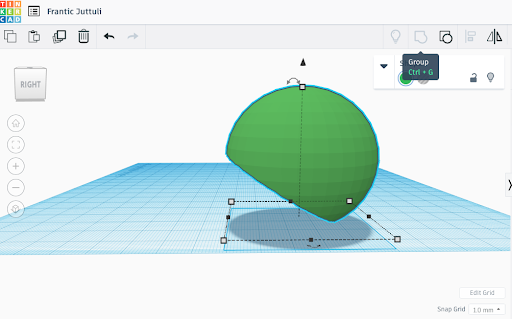
Step 3: Let’s create the bulging white belly for the green bird. Take another sphere and colour it white, and repeat the same previous steps and slice away the green part of the body.
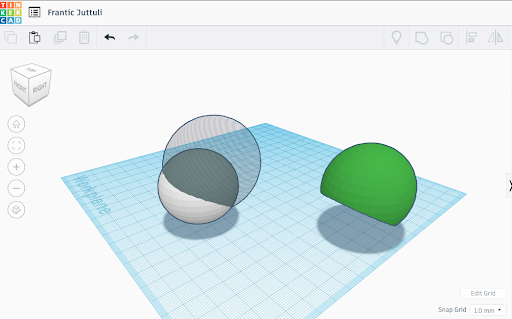
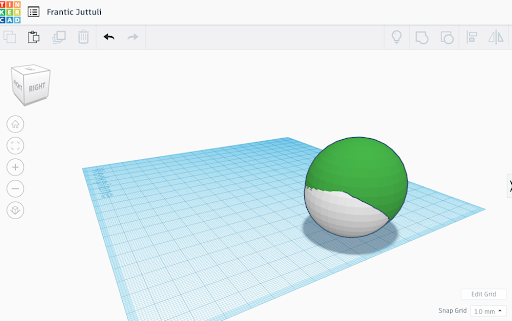
Step 4: Perfect! Now you have two halved-spheres. Combine the two spheres so they are touching each other! You now have a green and white sphere.
Method 3: Import .STL files into Tinkercad
Instead of creating new shapes from scratch, the easier method is to download pre-designed shapes from the internet and bring it into Tinkercad to modify. There are many websites that offer free .STL files: Thingiverse, Cults, and many more.
Step 1: Once you downloaded the 3D model of your choice, select Import at the top right corner on Tinkercad. Make sure the downloaded model file is in either, .STL, OBJ, or SVG. Select the file by drag and drop, or by browsing through your files.
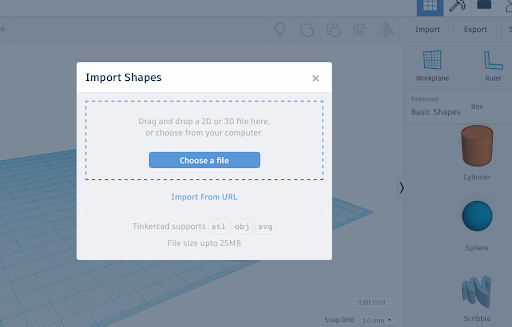
Step 2: Once the design is uploaded, you can now modify this object by adding or taking shapes away with the methods that were mentioned above.
Hope these three methods can help foster more creativity within your Tinkercad design. Visit more Tinkercad-related blogs for more step by step tutorials!



Add a comment to: Tinkercad: How To Modify And Create New Shapes